One would think that I would be rather busy this weekend. Actually it isn’t too bad. Everyone else is busy with family. I only have one service each evening, and office was closed Thursday and Friday. So I thought I would make some cookies for the reception after our Easter vigil tonight. How about bunnies?
Well, I don’t have any bunny cookie cutters, but I do have a Glowforge and I have some 1/4" Proofgrade acrylic. Let’s see what I can come up with.
Can’t have just one bunny! They multiply fast!
It’s one file that takes an hour to process (edit:mainly because of double pass engraving at 340 LPI), but when it’s done, just glue together and you have a durable, bespoke cookie cutter. This is the base of the cutter. Using the same technique we have learned to make inlays of letters using Inkscape, I simply put one outline of a bunny in and used it for various operations, giving each its own color.
The base has a 1/16" deep engrave in it so that with the acrylic “blade cutter” can be inset in the engraved pocket to give the side more strength. I engraved with full power, 340 LPI and full speed with two passes.
The blade is about 1.5 mm thick. When glued into the engraved pocket, it is pretty rigid and doesn’t seem like it’s going to break. There is an almost imperceptiable narrowing of the blade from bottom to top of the edge so it’s like it’s sharp, thicker at the base and thinner at the top from the way the beam goes through 1/4" acrylic.
A little handle set into a pocket makes it really sturdy and easy to use.

I whipped up a batch of Alton Brown’s sugar cookies and put the bunny to work making more bunnies (after carefully washing the whole thing in warm soapy water!)
It worked perfectly!
Bunnies everywhere!
I like a crisper, well done cookie not those chewy dough balls!
Dust the inside of the cookie cutter with powdered sugar and brush it around. Make sure your cookie dough has a fine dusting of powdered sugar and the cookie gets cut out and released without sticking.
Build Notes:
This is a failure to cut the fine blades out. Didn’t make it all the way through the acrylic. Note the parallel lines going around the perimeter.
The design was perfect and would have printed out perfect the first time, but there were a couple things going on. I used the Chemcast acrylic, non-Proofgrade, for the test pieces, it’s just a hair thinner than Proofgrade. It works great but, the first two didn’t work out right. I couldn’t get the laser to go through like it should. So I checked things out:
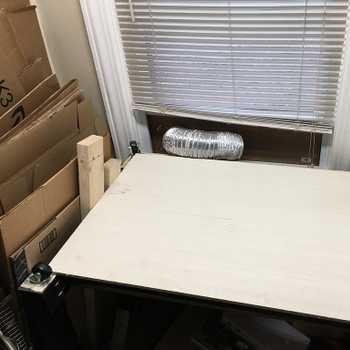
This is my screen on the vent to the outside after six hours of engraving acrylic. Lots of acrylic powder. So if this is the screen, what must the inside of the Glowforge look like? Yep, pretty dusty. So I did the recommended procedures for cleaning the lens and the windows and it immediately was back to full power. Was wondering what the heck was going on yesterday.
So now I have two cookie cutters, one Proofgrade and one in the Chemcast. As I was using them, I thought about making one cutter a mirror to help with the tiling problem on the dough. An Escher I am not.
The file has several operations:
- It cuts the blade and the handle. The handle is cut out of the center of the blade.
- Then the cookie form exterior is cut and the handle recess.
- Then the area to be engraved is scored to sharpen the edges up for the blade to glue up against
- Then the rabbit shape pocket is engraved.
So have at it. I think it will be so cool to make your own custom cookie cutters with a Glowforge. I already have a request for a trout!
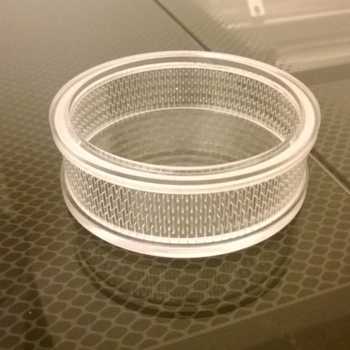
One final note: the cookies are in an acrylic hump bowl I made after @jules pattern. It worked fine, although I had a problem going through the acrylic yesterday when I printed it even though I put it at 95% power and 15 speed two passes which normally works for the Chemcast with power to spare. I just though that there was still some tweaking going on with settings. I didn’t want the whole 10" piece of acrylic to go to waste so I engraved the back with three passes and that went deep enough to meet the cut from the other side and release the acrylic (except for a little spot that missed a layer of engraving from inaccurate positioning… Proof of concept. I’ve been working on one in 1/8" proofgrade and another in the chemcast 1/4"
Bonus cutter, untried as to how it works with dough and doing the blades. Will test out later. Right now I have an hour long cutting operation: 10" lace, slump bowl in 1/4" acrylic. Lots of diamonds!
Hedgehog Cookie Cutter: Evidently for these the icing makes it!
