Posted by
wesleyoftherose
Joined Feb 24, '17
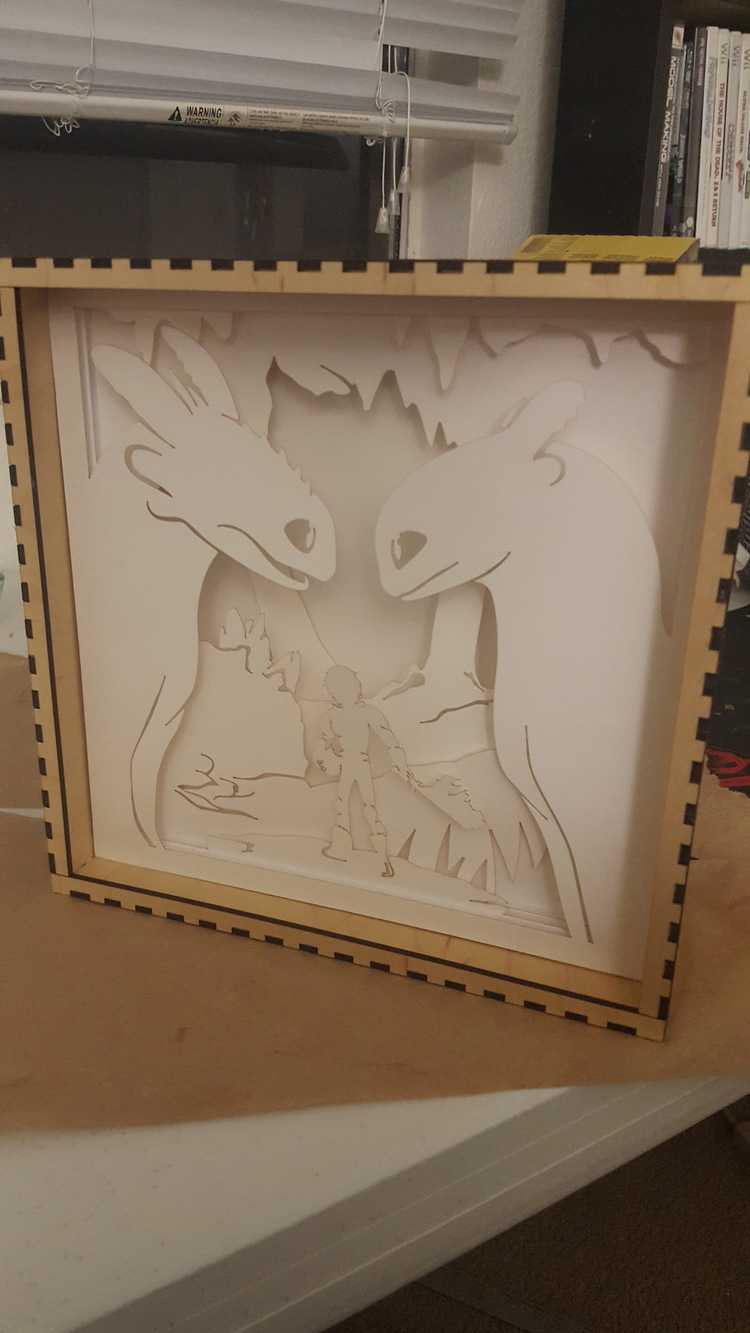
My poor Glowforge has not been seeing much use lately, as I have been buried with other side projects as well as a general lack of inspiration. But last week, with Dreamworks’ announcement of their upcoming trailer and poster for How To Train Your Dragon: The Hidden World, I was hit suddenly with a MIGHTY NEED to show off my excitement.
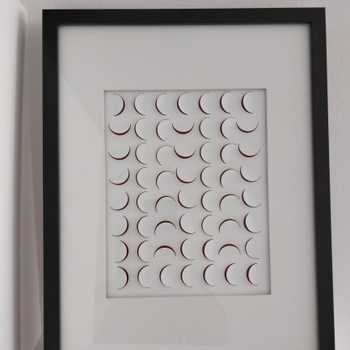
I had seen examples of some very stunning looking paper-cut lightboxes and knew I instantly I wanted to make one of my own. Most of the examples I’ve seen utilized meticulous tracing and carving with an X-Acto knife. Me – well, I had a more efficient way of cutting things. 
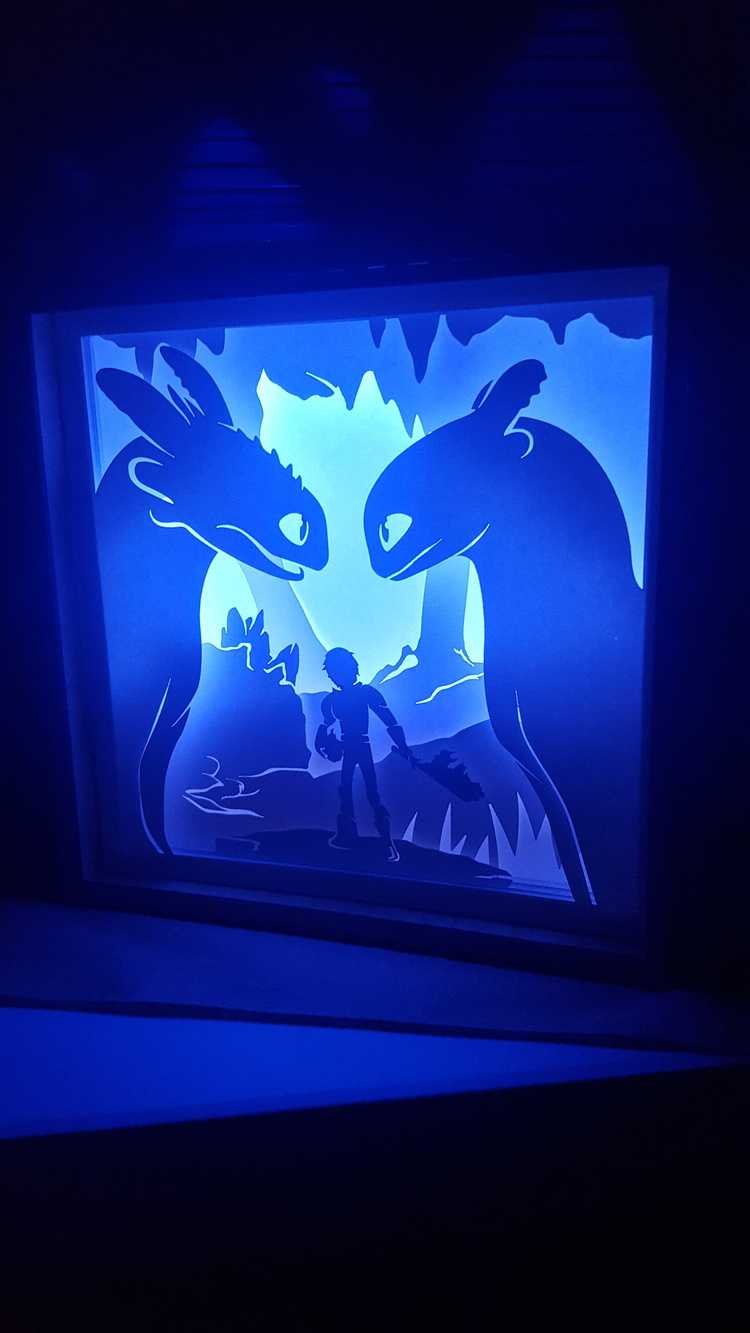
Yay!! I used an online box generator for the exterior shell (see bottom for references) to save time and energy. Twelve hours and $30 later, the electrical components arrived. I’m no engineer by ANY means, but installing the LED strips and plugging into a power cord was probably the easiest step. From there, I probably spent the next hour in my room with the lights off…
All in all, completion time is probably about 2 days. Budget was around $35 (the wood from the box was free proofgrade material I’d received). It has been a pleasure and a whole lot of fun working on this. I hope to make more in the future. Thank you all for reading! Please let me know what you think.
REFERENCES
http://www.makercase.com/
The online box generator I used to make the exterior shell. Amazing tool!
“How to Make a Paper-Cut Light Box : DIY” by YouTube user Chezlin
A wonderful tutorial that basically gives you a step-by-step on how to make custom light boxes such as this. Just replace the parts where she cuts manually with an X-Acto knife with you doing the lasering with your Glowforge. 
…And of course, Dreamworks’ Premiere Poster
Like and follow their official Facebook page for updates on this amazing animated series!!
Thanks again for reading! This is my first major project outside of test prints that I made and my first time showing off, so I hope you like it. 


Start with an idea. Create your design. Hold something in your hand you only imagined an hour ago. Glowforge makes that possible.

From idea to design to creation. No matter what you want to make your Glowforge can help you make it happen.