Posted by
septimus39
Joined Oct 2, '15
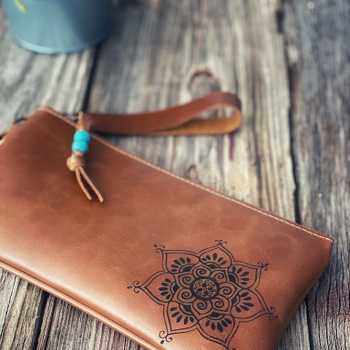
I’ve been playing with leather a lot, and finally dove in on this small project, which is actually part of the test phase for a similar, but larger project. I’m just so tickled with how this turned out, I wanted to share it.
This is a leather cover made for one of the miniature composition books I’ve always got laying around. I learned a lot on this project, and wanted to pass along whatever I can to the rest of you. First off, you might be able to see some inconsistency in the finish. Some of that is likely due to me not being particularly good at dyeing leather yet, but the most obvious bits are because of overly-sticky masking material. I put on some blue painter’s tape, cut my design, then immediately removed the tape, but it still stuck on pretty firmly. On the outer part I even tried using a heat gun to help the tape release, but that seemed to make it worse, and I did more damage to the surface than I’d done on any other piece, even when I’d left the tape on for days. Heat and my tape is very much not a good mix, apparently. The first lesson is to test your techniques on piece you don’t mind messing up. The second lesson is to buy good materials. You can probably also see some surface dings, and those are because I bought the really cheap leather, with all the scars and holes in it. It’s good enough for a little beater notebook I’m going to carry in my pocket while hiking, but if you want to make something beautiful as a gift, it’s worth getting the good stuff. Some imperfections in the surface of your leather might seem like no big deal before you get started, but leather dye has a way of highlighting them.
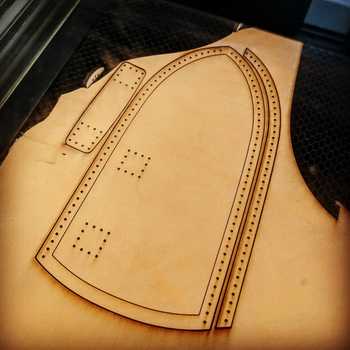
Here’s the inside of the cover. This is where the next lesson comes in. Templates are very handy, and so is a scanner. I laid my notebook flat inside my scanner and then imported the image into Inkscape and traced around it. Doing that gave me a 100% accurate template of the notebook itself to start designing around. I added a little bit of material here and there on the screen, and it all worked out pretty perfectly on the finished product, too.
Last lesson is this: Don’t Panic! If you’ve been wanting to try making leather projects using your Glowforge, it’s really not as hard as you might think. Using the laser to cut your pieces and your stitches makes the project go much more quickly, and also means you don’t have to buy some of the expensive specialty tools that traditional leatherworkers use. The cheap veg-tan leather from Tandy is great for practice and making personal projects while you work up to bigger, better projects. When I find a good masking material for it that doesn’t damage the surface, I’ll let you all know.
Thanks!

Start with an idea. Create your design. Hold something in your hand you only imagined an hour ago. Glowforge makes that possible.

From idea to design to creation. No matter what you want to make your Glowforge can help you make it happen.