Here are the two projects I completed today.

The first here is a simple engrave on a 4’x4’ tile.
I used a cut line and a sheet of construction paper to help line the tile up on the bed.
This is a time-lapse of the engrave.

I used masking tape during the engrave that i left on while i applied a thin coat of paint for etch. Afterwards I scrapped the tape off with a razor and gave it a quick wipe with isopropyl to remove residue from the masking tape.
My second project for the day was a 4"x16" black ceramic tile.
First step like before i measured the tile accurately and cut out the placement with 2 sheets of construction paper. I made a negative of the image because i wanted the engraved areas to be lighter and use the black of the tile for the shadows.

After masking again (i dont think i will do it this way next time) and a 2:36min engrave,
I ended up here.


I was pleased with the detail but lost some in the shadows due to the masking tape, I was not very happy with the contrast tho. In my mind I assumed i would get a more frosted look on the tile.
Playing around with ideas i thought of sanding some copper pipe i had to make dust to somehow have it stick in the low areas. but testing on the corner it wasn’t very impressive. I settled on a simple option of just using plain old white chalkboard chalk.


Which I think turned out quite well. You cant rub it away with your hands but one swipe with a microfiber cloth and it cleans it perfectly.
I think it would be fun to use colored chalk to maybe add some subtle detail instead of the straight white.
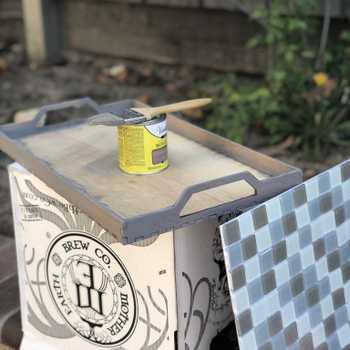
Then lacking the ambition to sleep I decided to create a frame for the large tile. a simple frame using the same cutout i used for the guide paper. adding some legs at around 15 degrees (in hindsight it should have been closer to 20 as it is a little front heavy).
Made the frame from some aromatic cedar i had laying around and some simple maple plywood. The frames legs just slot into the back so it can easily be taken apart with just a friction fit.

After about 30 mins of sanding and hand planing I applied a few layers of cutting board oil (watco butcher block oil & finish) I pressed the tile into the frame, again just a friction fit which is nice because if i want to change the image i can just knock the tile back out.


So in the end I was quite pleased with how it turned out for how simple it was to create and design. If you couldn’t tell that all ready by this long winded post lol.
If you made it this far or if you just skipped though the post thank you for taking the time to check it out. Have a great day. Cheers.