Posted by
evansd2
Joined Sep 18, '17

I wanted to make a curved box, but I don’t like the look for living hinges, and I don’t want to fool with using veneers to cover them up.
Enter kerf cutting. The general idea is that you remove material from the inside of your curve, and the wood can then be successfully bent. I’ll do this a bit differently this time and provide pictures with details inline, followed by technique and notes.
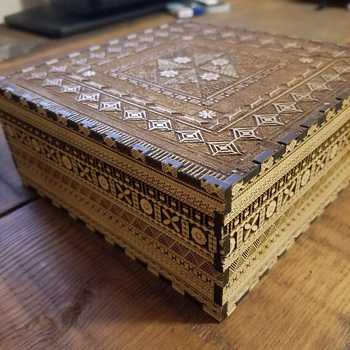
I intentionally kept the edges of the lid (maple) brown, just as they came off the laser. I liked the contrast, and know from previous experiments that end grain looks different from side, so it would have had an inconsistent color on the edges, which I didn’t like.
I chose to cut the box in two pieces and join them with decorative butt joints. This allowed me to use less material… if you choose to do it as one long band, the resulting strips are quite long.
Here’s a strip, essentially one half of the box.


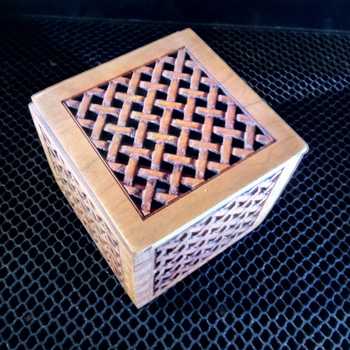
Here you go, the inside of the lid.


I’m not sure anyone has gone so far as to actually make a curved hardwood piece like this yet. It’s been discussed in theory, and kerf bending is a well known technique, but I was unable to find anyone else who had gone this far with it. If anyone knows of a prior post, please let me know.
I started thinking this would be pretty easy. I made a “sawtooth” engrave to remove the kerf cuts, and got my settings dialed in, the end result would be a deep v-shaped engrave slot every 0.05" or so. This seemed like a good place to start.
Pro: Engraving the kerf relief worked.
Con: Settings proved really hard to get right. It seemed like it really wanted to just barely overburn and show through on the final outside surface. I had to do several test pieces to get it dialed in. Engraving is tricky.
To get the bends to be consistent and not crack, you have to soften the wood before you attempt to wrap it around your strongback. I used water. I wetted the surface of the maple over the entire kerfcut area and let it soak in. Once it was thoroughly waterlogged, bending went really well.
Pro: it was very successful
Con: it led to really messy laserfingers (water dissolved a bunch of the residue from the cuts/engraves) that wanted to put brown fingerprints on the wood. Don’t get it dirty, because you don’t have a lot of wood to sand away to clean it up later. It also added time to the process, because you have to let it dry thoroughly before moving onto final sanding/finishing. I left my masking on as long as possible to prevent as much mess as I could.
If you’re going to try it:
Give yourself ample time to work out your proper engrave depth, or perhaps use the defocusing technique that @paulw fooled with here. This was by far the trickiest part. Unfortunately (?) for me, I hadn’t seen Paulw’s post before I built this, so I never tried his defocusing method.
Test your bend radius before you commit to a fullsize piece. Bending a lot tighter is possible, but I found that when I tried to go too tight, the wood fibers started to split unpredictably. You just can’t go past a certain limit with maple, even when it’s softened. Think like a popsicle stick (from a popsicle you just finished). They break but sort of “softly”, kind of peeling apart before they go to pieces. This will no doubt vary by species or wood involved.
Determining the perfect inset size is difficult as well. You can get pretty close with math and material thicknesses, but there’s a lot of complexity happening with the wood here, so getting it perfect the first time is probably not going to happen. Cut your first attempt at a bottom out of cheap materials to test the size, and only once you get it just right go for your premium material. I decided to embed the bottom in mine, so I went with baltic birch ply, as no one will see the edges. (and the color is close enough to maple to be ok)

Start with an idea. Create your design. Hold something in your hand you only imagined an hour ago. Glowforge makes that possible.

From idea to design to creation. No matter what you want to make your Glowforge can help you make it happen.